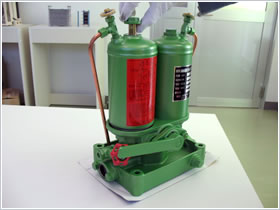
How to replace/clean element
- HOME
- How to replace/clean element
How to replace element
Please check the model code of your filter.
| Filter type | Model code |
|---|---|
|
Upward extraction type |
UL type, UM type, UH type, LCN type * 1, TL type * 1, TR type * 1, TRF type * 1, TSF type * 1, TRF type * 1, VN type * 1 |
|
Downward extraction type |
351 type, 3501 type, 3502 type, SH type, TM type |
|
Modular type |
4201 type, GC type, GF type, GM type, MVF type * 1 |
|
Horizontal extraction type |
ISH type, STU type |
|
Center rod type |
LN type, LND type, AK type * 1 |
|
Duplex type |
BCS type * 1, BCV type, BDV type, BOS type * 1, COS type * 1 |
|
Cartridge type |
107 type, CF type, CS type, FP-400Z type |
Topless type
-
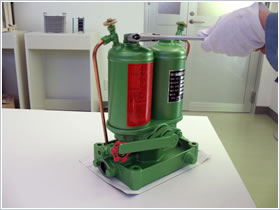
Preparation
 After stopping the hydraulic system and confirming that the pressure of the filter has reached [0], remove the drain plug and completely drain the oil inside the main body.
 -
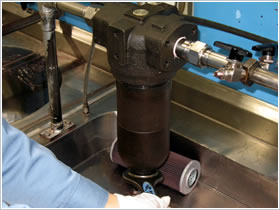
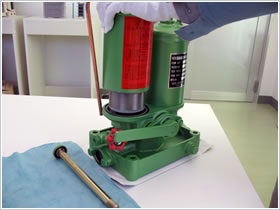
Disassembly
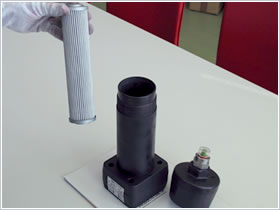
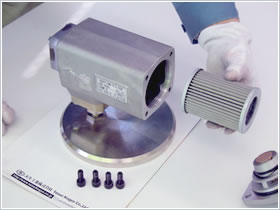
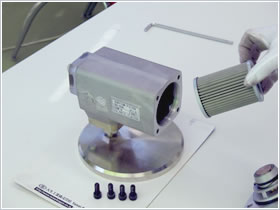
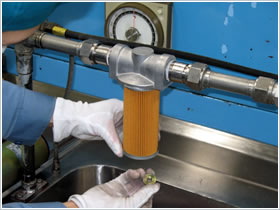
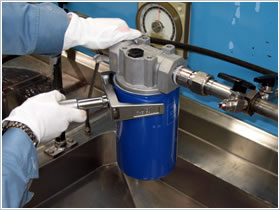
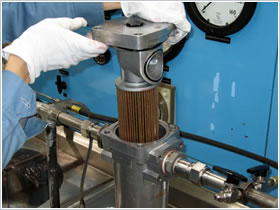 Remove the bolt that tightens the lid, turn the lid left and right and pull it out to the top, and the spout and element can be taken out as one.
 -
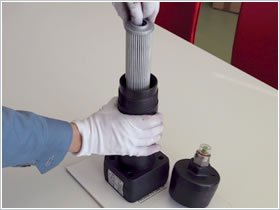
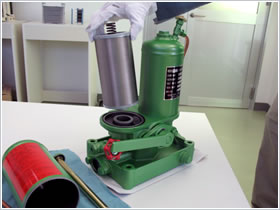
Confirmation of replacement parts
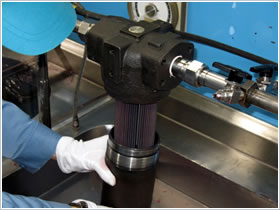
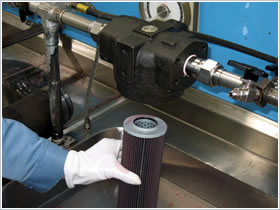
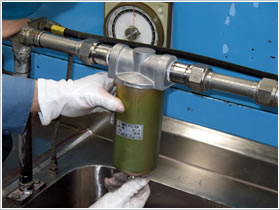
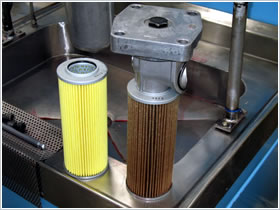 Wire mesh elements and notch wire elements can be washed and reused, but filter paper elements should be new. (Photo filter paper element)
Please also prepare a seal material set (SP) for element replacement. -
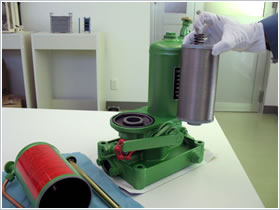
Replacing the element
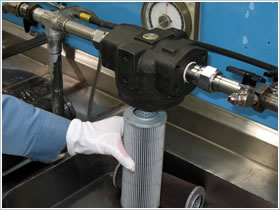
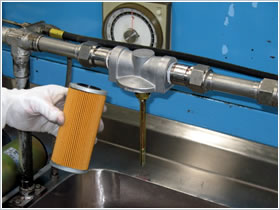
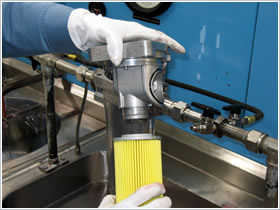 Remove the used element from the spout and install a new (or cleaned) element.
For the element replacement sealant, remove the used sealant and replace it with a new one. -
Reassembly, confirmation
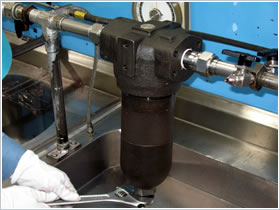
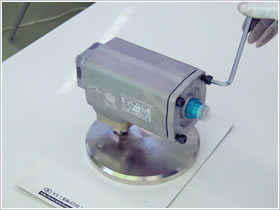
 Assemble in the reverse order of disassembly. At that time, be sure to confirm that the flow direction of the fluid indicated on the lid is correct.
Close the lid bolt and drain plug to the specified torque.
Undercut type
-
Preparation
 After stopping the hydraulic system and confirming that the pressure of the filter has reached [0], remove the drain plug and completely drain the oil inside the main body.
 -
Disassembly
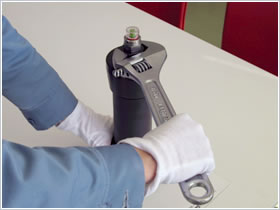
 Put a spanner on the two-sided chamfer of the lower cover and turn the cover to loosen it.
 -
Disassembly2
 When you can turn it lightly, turn it by hand and pull out the lower cover downward.
For high pressure filters, pay attention to the weight of the case. -
Disassembly3
 If you pull the element downward, the element will come off.
 -
Confirmation of replacement parts
 ire mesh elements and notch wire elements can be washed and reused, but filter paper elements should be new. (Photo filter paper element)
Please also prepare a sealing material (SP) for element replacement. -
Reassembly, confirmation
 Assemble in the reverse order of disassembly.
Close the drain plug with the specified tightening torque.
Manifold type
-
Preparation
 After stopping the hydraulic system and confirming that the filter pressure has reached [0], loosen the air bleeding plug, remove the drain plug, and completely drain the oil inside the main body.
* For series without a drain plug in the filter body, drain the manifold block side. -
Disassembly1
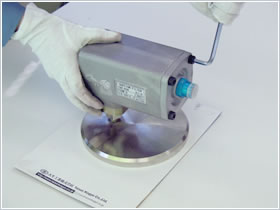
 Put a spanner on the top of the lid, turn the cover to loosen it, and remove it.
 -
Disassembly2
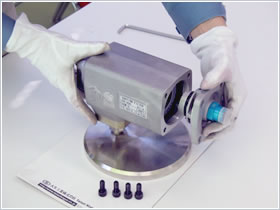
 Pull the element upwards.
 -
Confirmation of replacement parts
 Wire mesh elements and notch wire elements can be washed and reused, but filter paper elements should be new. (Photo filter paper element)
Please also prepare a sealing material (SP) for element replacement. -
Reassembly, confirmation
 Assemble in the reverse order of disassembly.
Horizontal punching type
-
Preparation
 After stopping the hydraulic system and confirming that the pressure of the filter has reached [0], remove the drain plug and completely drain the oil inside the main body.
 -
Disassembly1
 Remove the bolts that secure the cover and pull the cover sideways.
 -
Disassembly2
 Remove the element from the case.
 -
Confirmation of replacement parts
 Since the element is a wire mesh type, it can be washed and reused, but if there are harmful scratches or there is no cleaning effect, prepare a new one.
Please also prepare a sealing material (SP) for element replacement. -
Reassembly, confirmation
 Assemble in the reverse order of disassembly.
Center rod type
-
Preparation
 After stopping the hydraulic system and confirming that the pressure of the filter has reached [0], remove the drain plug and completely drain the oil inside the main body.
 -
Disassembly1
 Remove the nut and pull out the case downward.
 -
Disassembly2
 Remove the round nut, washer, and packing that secure the element, and pull out the element downward.
 -
CONFIRMATION OF REPLACEMENT PARTS
 Wire mesh elements and notch wire elements can be washed and reused, but filter paper elements should be new. (Photo filter paper element)
Please also prepare a sealing material (SP) for element replacement. -
REASSEMBLY, CONFIRMATION
 Assemble in the reverse order of disassembly.
Switching type
-
Preparation
 After stopping the hydraulic system and confirming that the filter pressure has reached [0], loosen the drain valve and completely drain the oil inside the main body.
It can be replaced even during operation, but in that case, make sure that the switching valve is switched to the opposite side before starting work. (The photo is an example of shutdown, so there is a valve on the replacement side.) -
DISASSEMBLY1
 Remove the center rod.
 -
DISASSEMBLY2
 Please remove the case.
 -
DISASSEMBLY3
 Remove the element.
 -
CONFIRMATION OF REPLACEMENT PARTS
 Wire mesh elements and notch wire elements can be washed and reused, but filter paper elements should be new.
Please also prepare a sealing material (SP) for element replacement.
* The SP seal kit is for one element. Please prepare two sets when exchanging both. -
REASSEMBLY, CONFIRMATION
 Assemble in the reverse order of disassembly.
Cartridge type
-
Removal
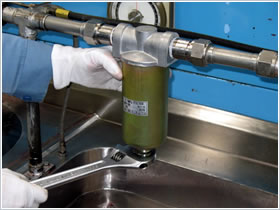
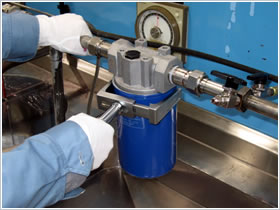 Stop the hydraulic system, check that the filter pressure is [0], and then turn the cartridge to loosen it.
When using a cartridge wrench or belt wrench, use a wrench near the main body to loosen it. -
Removal
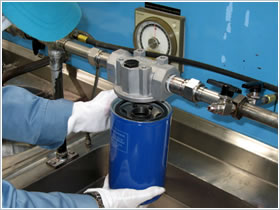 There is oil in the cartridge, so be careful of the weight and pull it down.
 -
CONFIRMATION OF REPLACEMENT PARTS
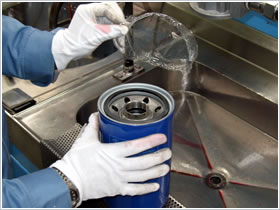 Please prepare a new cartridge. Used cartridges cannot be regenerated.
 -
ASSEMBLING1
 Apply oil or grease to the packing surface of the new cartridge and the mounting surface of the main body.
 -
ASSEMBLING2
 Turn a new cartridge by hand and close it to the specified torque value using a cartridge wrench or the like.
How to clean element
How to clean wire gauze & notch wire element
Please clean used elements with light crude (light oil, kerosene, etc.) according to the following procedure.
※ Make sure that only wire gauze and notch wire element are usable. Paper element should be replaced to the new one.
※Lineup of cleaning brush that is convenient for cleaning the element.
For 40 Mesh – 40 µm element
-
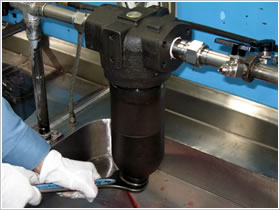
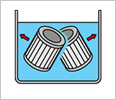
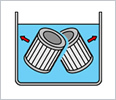
1. Immerse elements in light oil and shake them vertically and horizontally.
-
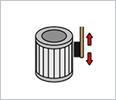
2. Brush off dirt on elements along the pleats.
-
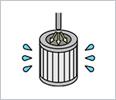
3. Blow off dirt by air spray gun.
-
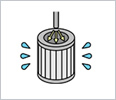
4. Rinse well.
-
5. Dry by air spray gun.
For element finer than 40 µm
For wire gauze elements finer than 25 µm, clean the dirt on its surface mostly following the above procedure, and then be sure to use ultrasonic cleaning.
Place the elements at oscillator side vertically and alternately for at least 1 hour each though it depends on capability of ultrasonic cleaning machine and degree of dirt of elements.
Contact
-
TEL
+81-3-6912-9922+81-3-6912-9922
Excluding Saturdays, Sundays and Holidays -
Inquiry & Request